Back to TheWorxHub for Senior Living Main Menu
Meter Reporting
Meter Reading Log Report
- Click on the Reports tab, then select the Assets tab.
- Select Meter Reading Log Report from the list of available report options.
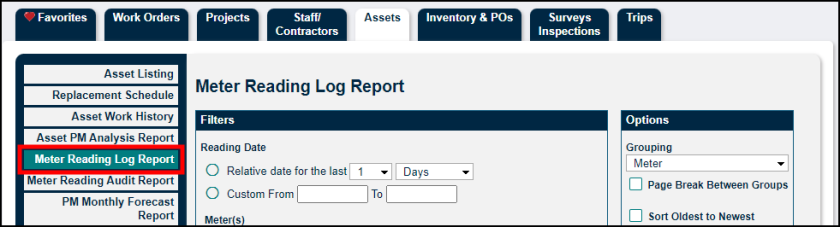
Filters
- Choose one of the following options for the Reading Date:
- Relative date for the last (#) (time period). For example, to see meter reading data from the last 20 days, select 20 in the first drop down menu, and Days in the second drop down menu.
- Custom from (date) To (date).
- To select the Meter(s), click the search icon (
), then check the box next to any Meter Name you would like included on the report. Click Done to save your selections.
- If you need to filter by a Location, type and select the name of the location or click the Location Picker (
) and select it from the pop-up window.
Options
- Grouping - In this drop down menu, choose how you would like the data to be organized.
- Page Break Between Meters - If you need the report to only show one meter per page, check this box.
- Sort Oldest to Newest - Select this option if you need the data sorted in reverse chronological order.
- Print Filters - Check this box if you would like the filter options you choose for the report printed on the report.
- Custom Output Name - If you would like to enter a custom name, enter the report title in this field.
Output Format
- Choose the output form of either PDF or Excel.
Save as Favorite
- If you would like to save the report as one of your favorites, enter the title of the report in the Favorite Name field.
- Choose the favorite group the report should belong to.
- Click Save.
- Click the Run Report button to generate the report.
Meter Reading Audit Report
- Click on the Reports tab then select the Assets tab.
- Select Meter Reading Audit Report from the list of available report options.
Filters
- Choose one of the following options for the Reading Date:
- Relative date for the last (#) (time period). For example, to see meter reading data from the last 20 days, select 20 in the first drop down menu, and Days in the second drop down menu.
- Custom from (date) To (date).
- To select the Meter(s), click the search icon (
), then check the box next to any Meter Name you would like included on the report. Click Done to save your selections.
- If you need to filter by a Location, type and select the name of the location or click the Location Picker (
) and select it from the pop-up window.
- If needed, check the box next to Only show Readings that triggered Work Orders.
- For threshold meters, check the box if you want the report to only show meter readings that are outside the meter's threshold.
- To filter by Reading Range, enter the meter reading range in the From and To boxes.
Options
- Show only last (#) - This field allows you to determine how many meter readings per meter show on the report. If you leave this box unchecked, it will include all meter readings that match the filters you selected.
- Grouping - In this drop down menu, choose how you would like the data to be organized.
- Page Break Between Meters - If you need the report to only show one meter per page, check this box.
- Sort Oldest to Newest - Select this option if you need the data sorted in reverse chronological order.
- Include Ref WO - If the meter reading occurred in association with a work order, the work order number will show on the report.
- Include Performed By - Select this option if you would like the report to include who performed the meter reading.
- Include Notes - Check this box to see any notes on the report that were added with the meter reading.
- Include Triggered WOs - If a work order was generated because of a meter reading, the work order number will show on the report.
- Include Triggered WO Completion Date/Time - If a work order was generated because of a meter reading, the completion date and time for the work order will show on the report.
- Print Filters - Check this box if you would like the filter options you choose for the report printed on the report.
- Custom Output Name - If you would like to enter a custom name, enter the report title in this field.
Output Format
- Choose the output form of either PDF or Excel.
Save as Favorite
- If you would like to save the report as one of your favorites, enter the title of the report in the Favorite Name field.
- Choose the favorite group the report should belong to.
- Click Save.
- Click the Run Report button to generate the report.
